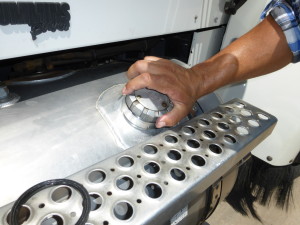
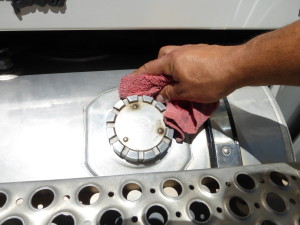
Step 1 - Clean Fuel Cap Area
Clean existing fuel cap area with the fuel cap secure in original operating position (Be sure to leave existing fuel cap on while cleaning to avoid contamination). This step is optional, but recommended.
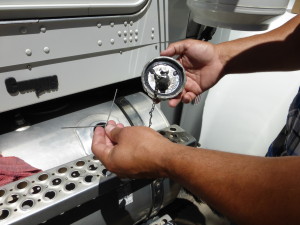
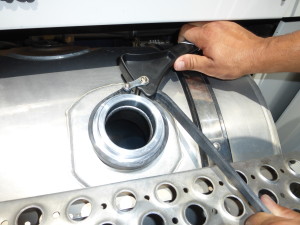
Step 2 - Remove Cap & Retaining Chain
Remove existing cap and retaining chain.
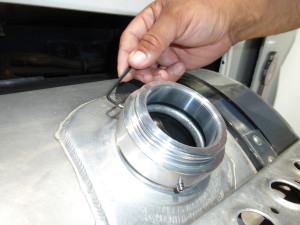
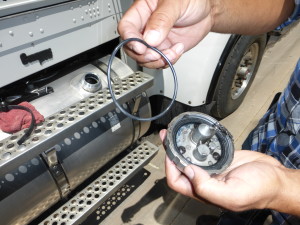
Step 3 - Check If O-Ring Is In Place
Remove Leak Defender from package and check to see if O-Ring is in place on the under side of the Leak Defender.
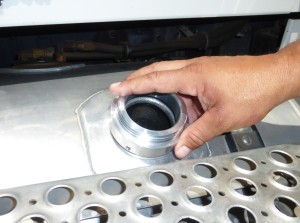
Step 4 - Twist On Leak Defender
Install Leak Defender on existing fuel tank neck by turning clockwise.
Step 5 - Tighten Leak Defender
Using a non-abrasive strap wrench to tighten the Leak Defender ensuring the O-Ring seals to the tank neck.
Step 6 - Install Set Screws & Tighten
Install set screws and tighten until secure with included Allen Wrench.
Step 7 - Remove Existing Cap Gasket & Install New O-Ring
Remove existing cap gasket and install the new Leak Defender cap O-Ring.
Step 8 - Twist On Fuel Cap
Replace the retaining chain and screw fuel cap on to the Leak Defender. (Please note, that if your existing cap does not properly tighten, you will need to a new fuel cap.)